


Redmi K20 Pro (Mi 9T Pro) is one of the most famous phones in the custom ROM development community. There are many custom ROMs available for Redmi K20 Pro/ Mi 9T Pro and it gets confusing as to which one to install. Today let’s talk about OxygenOS for Redmi K20 Pro and let’s see how to install it.
OxygenOS is OnePlus’s skin over Android and it is one of the best skins on android out there. OxygenOS is clean, fast, bloatware-free and fun to use. If you’re bored of the same old MIUI interface on your Redmi K20 Pro, then I highly recommend you to try out OxygenOS as it is literally one the best software experiences out there.
Related Post: Top 4 Custom ROMs for Redmi K20 Pro
OxygenOS for Redmi K20 Pro
Google announced the Project treble support for Android phones running on Android Oreo (Android 8.0) and above. Project treble allows the flashing and use of GSI’s (Generic System Image). Hence you can flash the GSI of OxygenOS on your Redmi K20 Pro and experience it in its full glory. Kudos to the developer for constantly working on this ROM and providing us with the best experience possible. I love the custom ROM development community.
Here’s a link to the telegram channel for updates on ROM’s, Kernels and GCam for Redmi K20 Pro – Telegram Channel.
Before you install OxygenOS on your Redmi K20 Pro there are some Pre-requisites, so let’s talk about them.
Pre-requisites
- Unlocked Bootloader
- Custom Recovery Installed (TWRP Recovery is recommended)
If you don’t know how to do the above two things, don’t worry. We have a different article on How to Unlock Bootloader and install TWRP Recovery on a MIUI Phone.
Read that article carefully and follow it step by step to unlock the Bootloader of your phone and also install TWRP Recovery. Please note that this process will erase all the data on your phone. Hence please take all the necessary backups before you proceed.
How to Install OxygenOS on Redmi K20 Pro –
After you have an unlocked boot loader and TWRP recovery installed on your phone, follow these simple steps in order to install OxygenOS GSI.
-
Wipe Data, Dalvik and Cache
Switch OFF your phone and go into TWRP recovery mode by pressing the power button + volume up button. Select wipe, then advanced wipe, select Data, Dalvik and Cache and wipe them.
-
Format the data on your phone
This step is very important as you will be flashing a GSI. Switch OFF your phone and go into TWRP recovery mode by pressing the power button + volume up button.
Once you’re in TWRP Recovery mode, go to Wipe and then click on Format Data. It will ask you to confirm it, type yes and proceed. After that all the data on your phone (including internal storage) will be formatted.
-
Install OxygenOS GSI files
After formatting the data, copy and paste the GSI files linked below to your phone’s internal storage, or use an OTG Pendrive.
Download these 3 GSI Images and save them to the internal storage of your phone –
You will also need to download Magisk for Redmi K20 Pro from here – Click Here.
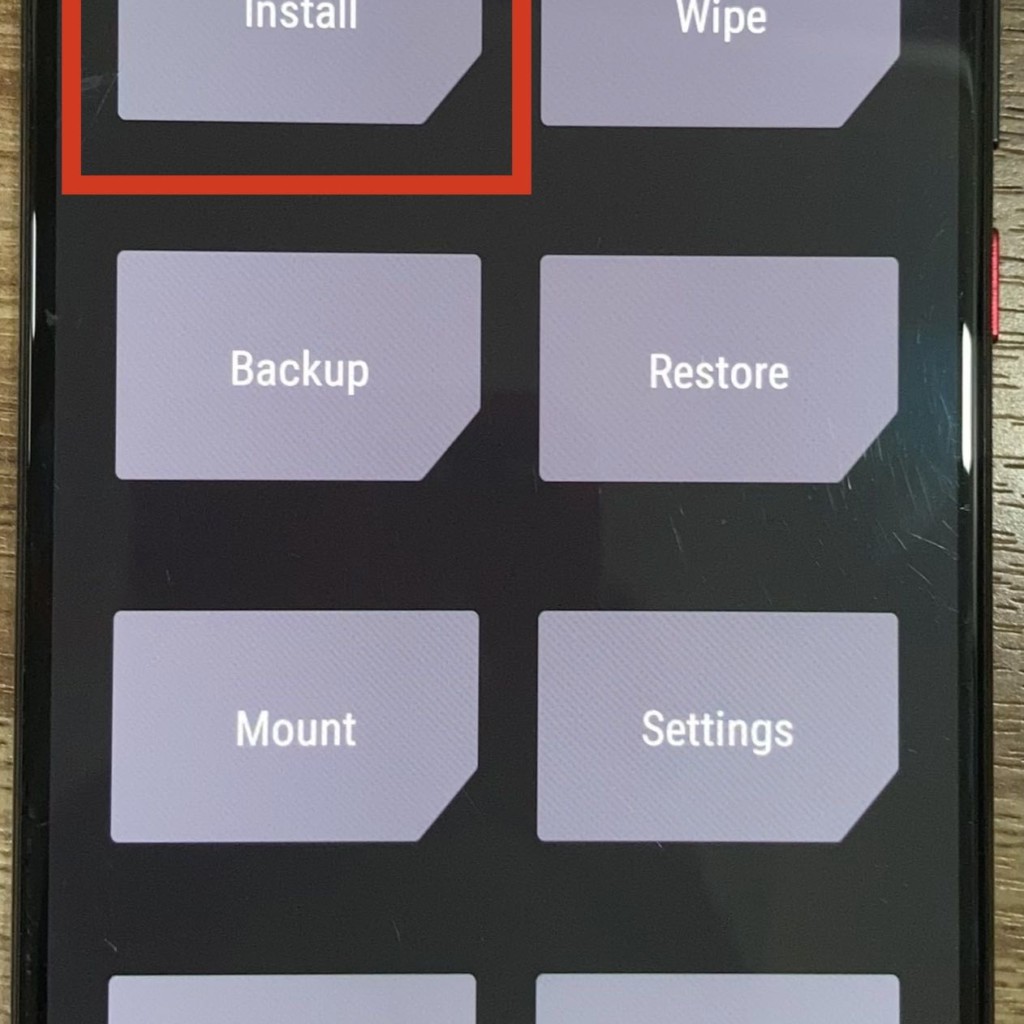
- Once you download the above mentioned files and save them to your internal storage, go to TWRP Recovery and select install.


- Next, select Install Image button at the bottom

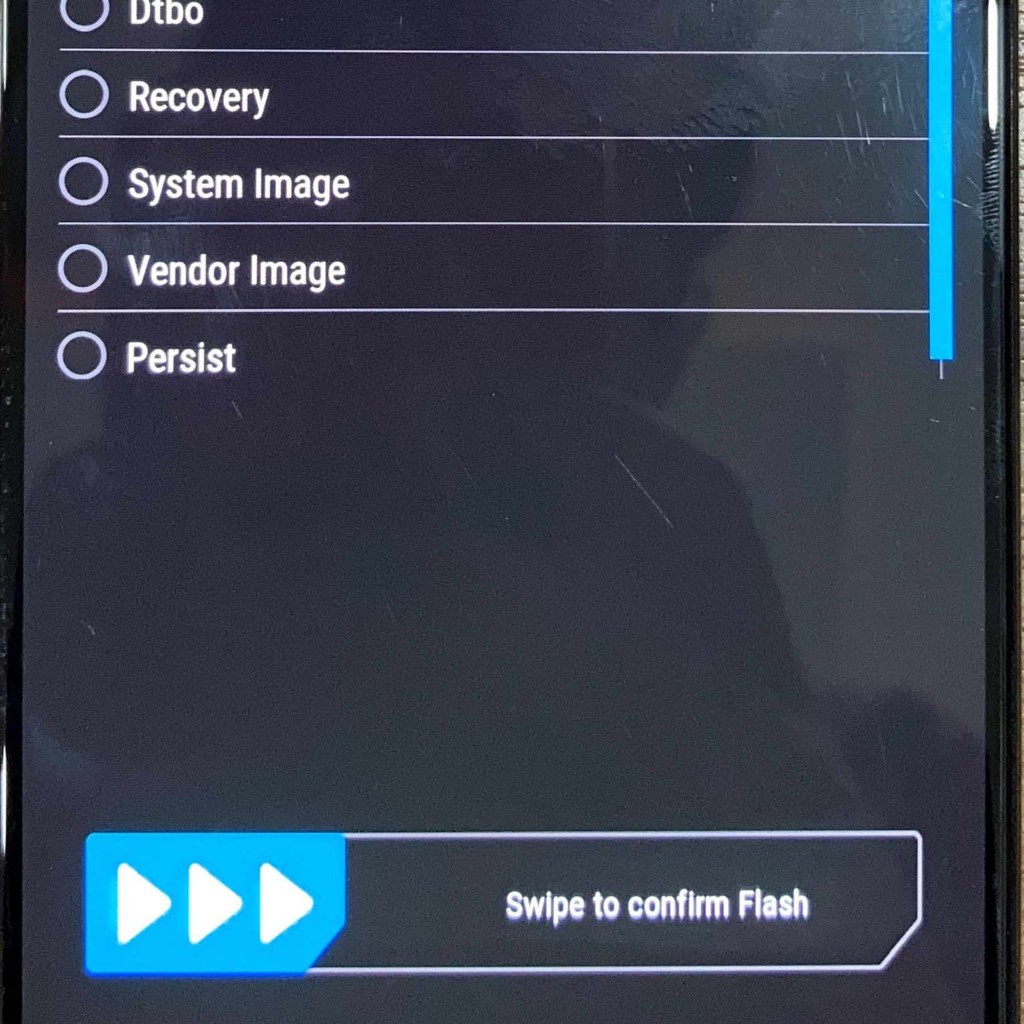
- After that, select the boot image file and make sure to install it in the boot image section

- Similarly install the Vendor Image in Vendor Image and System Image in System Image
- Finally, flash the Magisk Zip file by selecting Install Zip button at the bottom and then flash the downloaded zip file
-
Reboot System
After you follow the above steps, reboot to your system and OxygenOS startup screen should show up.
We hope that this article helped you out in installing OxygenOS on your Redmi K20 Pro. Thanks for reading and we’ll see you around.


I have always been passionate about technology. Trying out new gadgets like smartphones, laptops, headphones, etc. has always been very fascinating and one fine day, I decided to take this passion and turn it into something substantial. This is how technolobe was born.


One Reply to OxygenOS for Redmi K20 Pro – How to Install Guide
can i try with my moto e 1st gen ?
How To Remove Bloatware From Any Xiaomi Devices (Without Root): Easiest Way!
Best 24-Inch Monitors for Work From Home: June 2020!
Fantastic Windows 10 Icons And How To Install Them
11 Best Magisk Modules You Need to Try
Realme Watch 2 Launched: A Worthy Upgrade?
iQoo 7 Launched: Price, Specifications & Launch Date in India
Mi 11 Ultra: Into The Reckoning !!!
Surface Laptop Go Launched in India: The Most Affordable Surface!