


Hey guys welcome back to Technolobe.
Redmi K20 Pro has been in the market for quite some time now and it is by far the budget champion for 2019 so far.
Snapdragon 855, AMOLED Display, Pop-up camera, in-display fingerprint sensor, unto 8GB RAM and 256GB Storage. All this for under ₹35,000 ($480) is seriously a great deal.
Phones from Xiaomi have always been very popular amongst developers for custom ROMs and mods. Phone’s like the POCO F1, Redmi Note 7 Pro, etc. have so many custom ROMs and mods available for them.
It’s crazy to see how developers come up with these amazing mods and help us to have a better experience with our phones.
One such mod for the Redmi K20 Pro is – “Overclocking the display to 75Hz and 81Hz” . Yes you read that right, OVERCLOCKING THE DISPLAY.
When I first read that this is possible I couldn’t believe it. But, it does exist and even you can do it very easily and enjoy the higher refresh rate display.
Now please note that do this at your own risk. I would recommend you to do this only if you have experience with installing custom ROMs and mods and unlocking the boot loader, etc.
Okay, so now let’s go ahead and see how to actually do this to your Redmi K20 Pro –
Step 1 : Unlocking the boot loader
Well this step is a must and it’s kind of annoying if you’ve never done it before. So first up you need to download the Mi Unlock Tool from here.
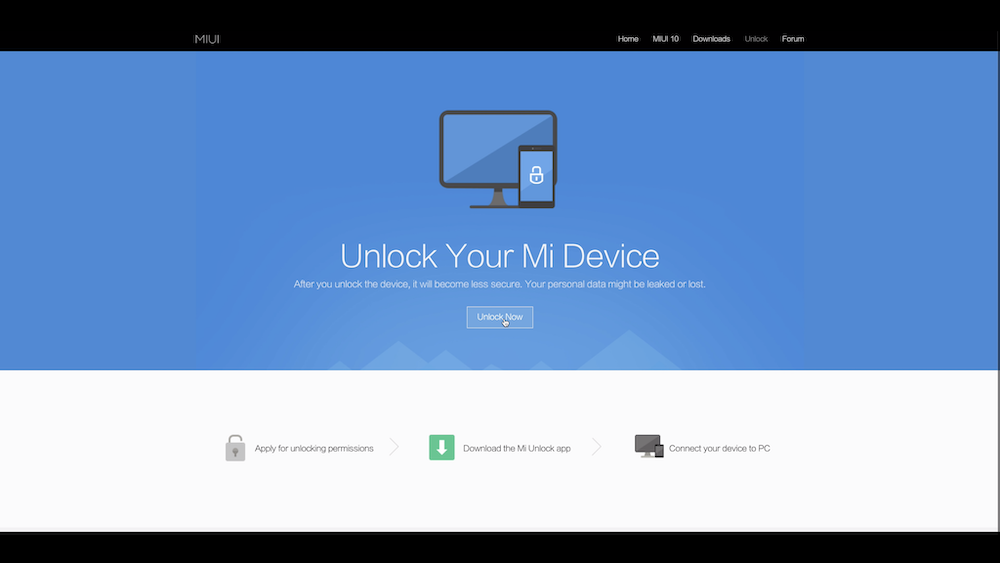

Once the Mi Unlock Tool is downloaded, extract the zip file into a folder and run the mi unlock.exe file to start the program. This program will enable you to unlock the boot loader of your phone.
Next step is to enable USB Debugging and OEM Unlocking on your device (Redmi K20 Pro). To do that –
- Got into settings -> about phone -> tap miui version 7 times (until you enable developer options)
- Go back -> additional settings -> developer options
- In developer options enable USB Debugging and OEM Unlocking
Once this is done, connect your phone to the PC via a USB cable in Fastboot mode. To go into Fastboot mode, press the Volume Down Button + Power Button simultaneously until you see the Fastboot Logo.
After this, login to the same Mi Account on the Mi Unlock Tool which is logged into your Redmi K20 Pro.
Next you have to click on Unlock Now. (Please note that unlocking will erase all the data so please take appropriate backups).
Step 2 : Installing TWRP Recovery
Once the phone is unlocked it will be factory reset. So please take all the necessary backup and then proceed.
Next up, download ADB Drivers and TWRP Recovery Files –
- Once the above two files are downloaded, install the ADB drivers on your PC. Then, unzip the TWRP Recovery zip file. The unzipping will result in a twrp.img file.
- Copy that file into the ADB Folder (It is generally in C:/ADB).
- In the ADB folder press shift + right click and select “Open Command Window here / Powershell here). This will open a command prompt window there.
- Next, again connect the phone to the PC in Fastboot mode. Once done, type the following commands in the command prompt window –
- fastboot devices
- fastboot flash recovery twrp.img
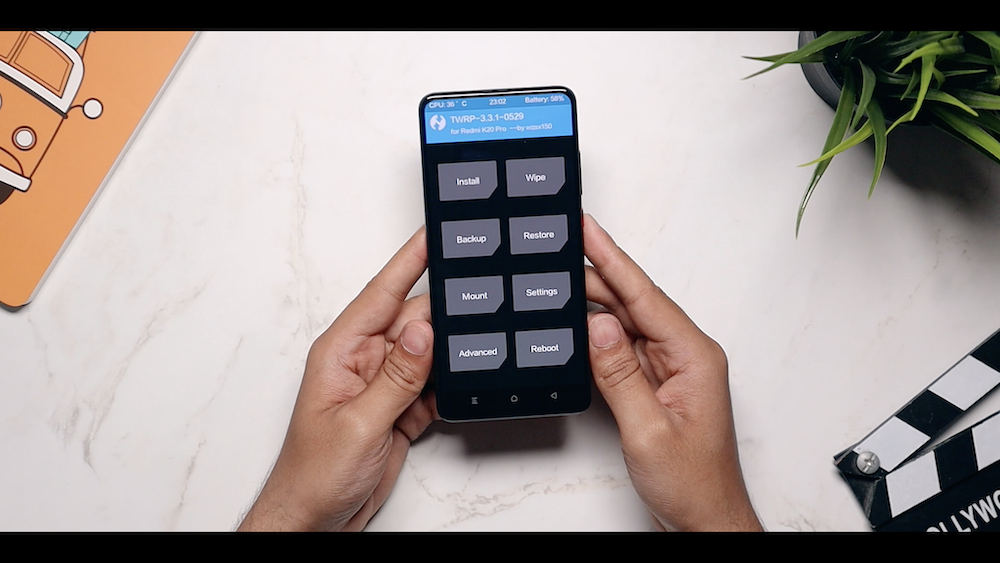

That’s it. This will install TWRP on your Redmi K20 Pro.
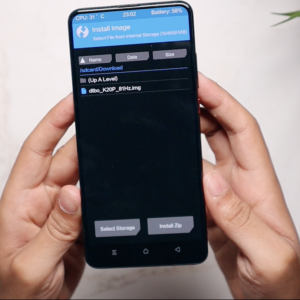
Step 3 : Installing the 75Hz or 81Hz .img file
Last step is to install the 75Hz or 81Hz file (whichever one you prefer) using TWRP.
First up download the appropriate file and place it in the internal storage / USB storage –
- Press the volume up button + power button simultaneously to go into TWRP Recovery
- Once in TWRP, select backup and backup the dtbo partition


- Then go back to the main page and select install.
- Then select Install Image
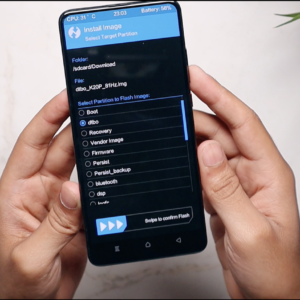
- Next up, select the .img file to install. (Either the 75Hz or the 81Hz)

- Lastly, again select dtbo and install the file


Once you follow these simple steps, you are done and now you can enjoy the 75Hz or 81Hz display on your Redmi K20 Pro.
I hope that this post helped you out. If you still have any more questions, feel free to reach out by commenting below or message me on Instagram.


I have always been passionate about technology. Trying out new gadgets like smartphones, laptops, headphones, etc. has always been very fascinating and one fine day, I decided to take this passion and turn it into something substantial. This is how technolobe was born.


One Reply to Overclocking Redmi K20 Pro’s display to 75Hz and 81Hz
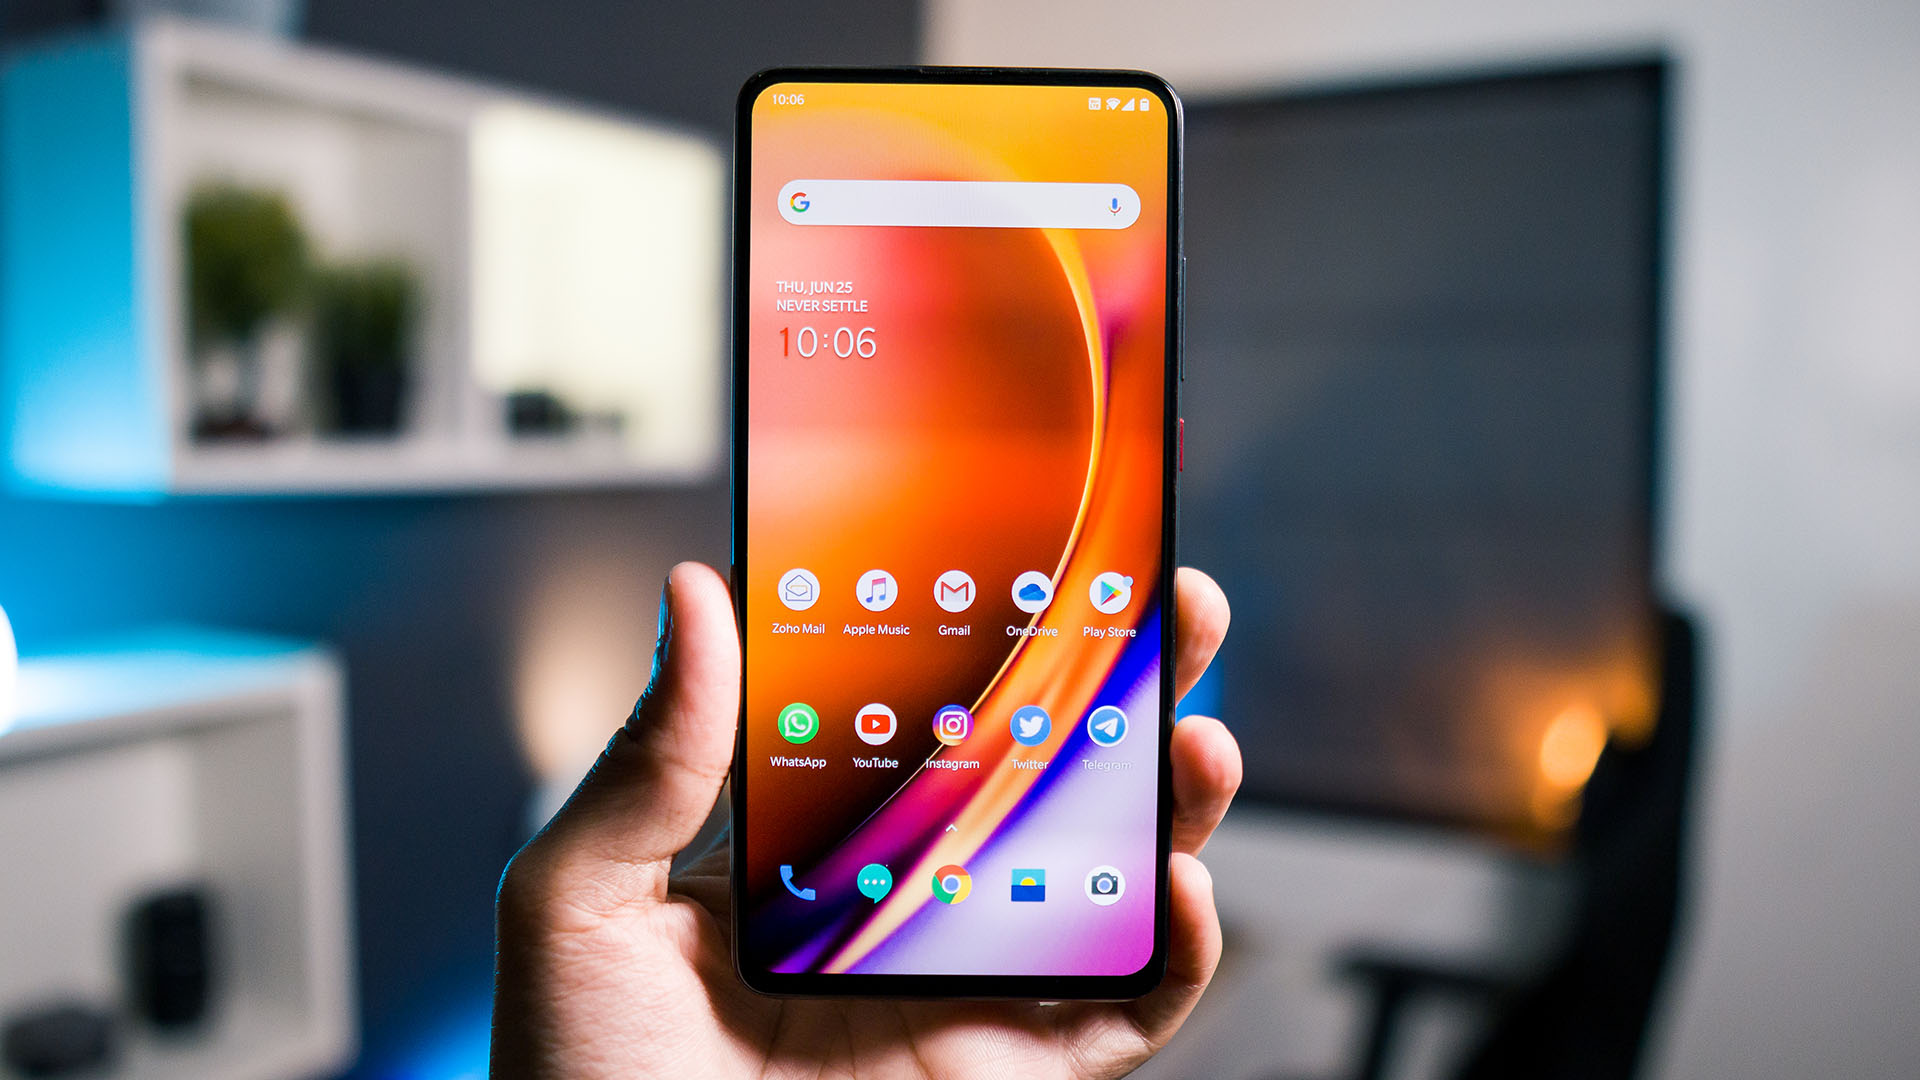
I want that k20 pro wallpaper!
Please!
How To Remove Bloatware From Any Xiaomi Devices (Without Root): Easiest Way!
iPhone 12 Pro, Max Specification Breakdown: The pick or skip dilemma?
The Minimalist Setup for Android Devices
How to Install and Uninstall Kernels in Android – Custom Kernels
Realme Watch 2 Launched: A Worthy Upgrade?
iQoo 7 Launched: Price, Specifications & Launch Date in India
Mi 11 Ultra: Into The Reckoning !!!
Surface Laptop Go Launched in India: The Most Affordable Surface!